You can reach the plugin General settings by choosing the WooCommerce → Settings → Shipping → UPS Labels from the sidebar.
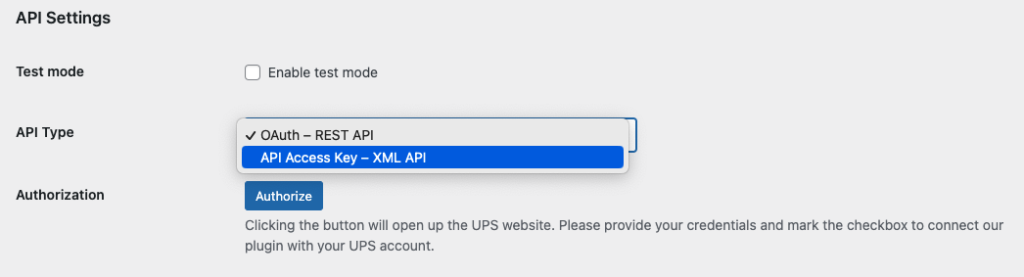
API Settings
Our plugin allows connecting via OAuth – REST API or API Access Key – XML API. Regardless of which method you’ll choose, you need to register a UPS account to use the UPS shipping services.
You can switch between the API Type by selecting one in the dropdown list.
OAuth – REST API
For this method, you only need to own a UPS Account.
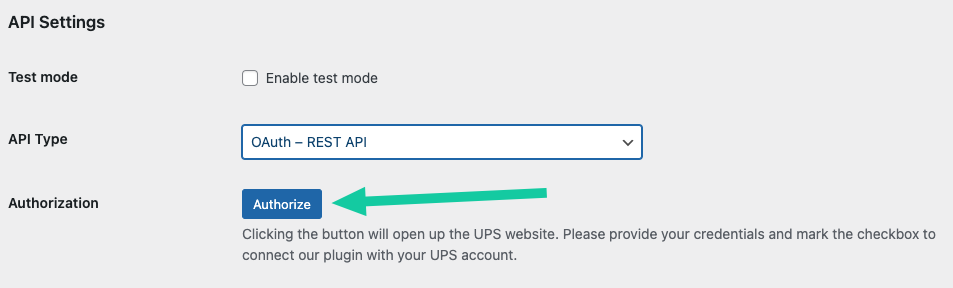
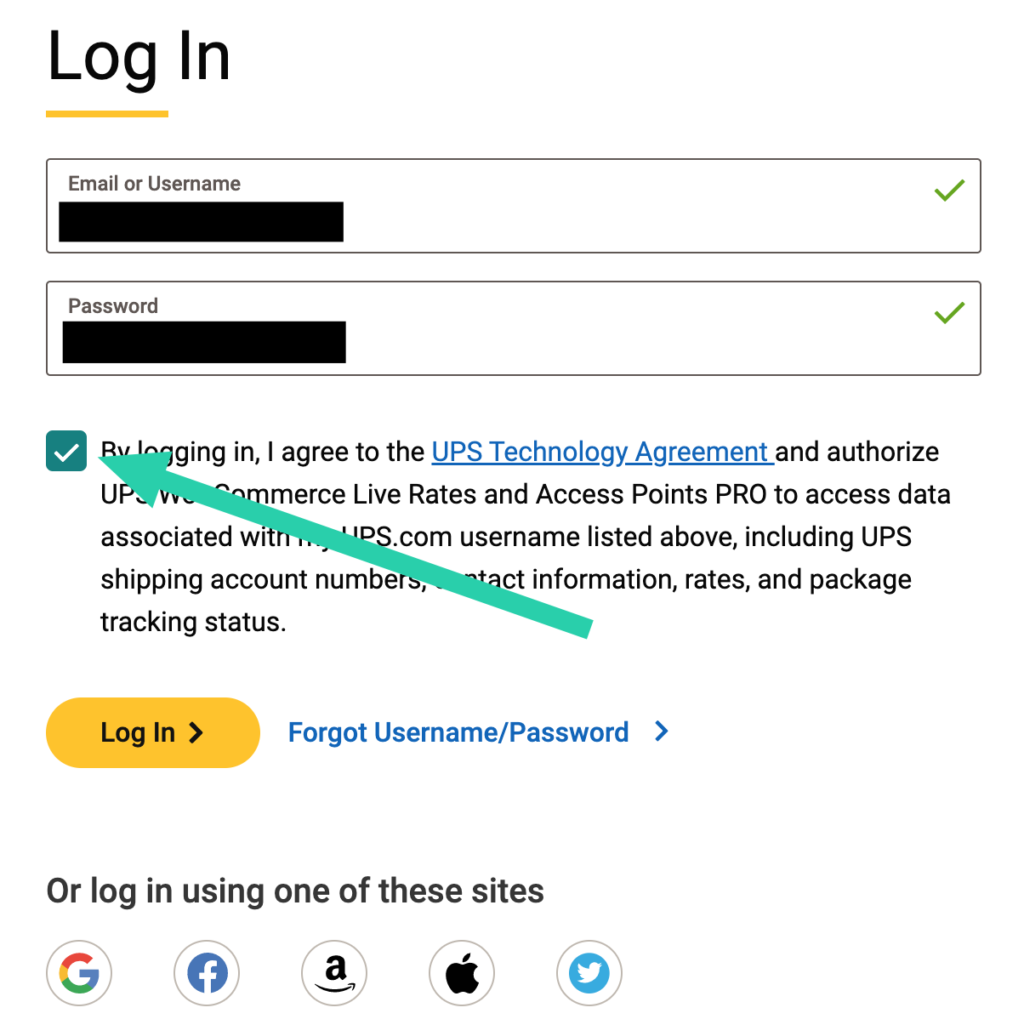
Press Authorize to be redirected to UPS.com site. Then please type your UPS email or username, password and agree to connect our plugin with your account by checking the checkbox. Then click Log In.
Once the OAuth connection is established, then you’ll see a Revoke button and the API Connection Status as a green OK.
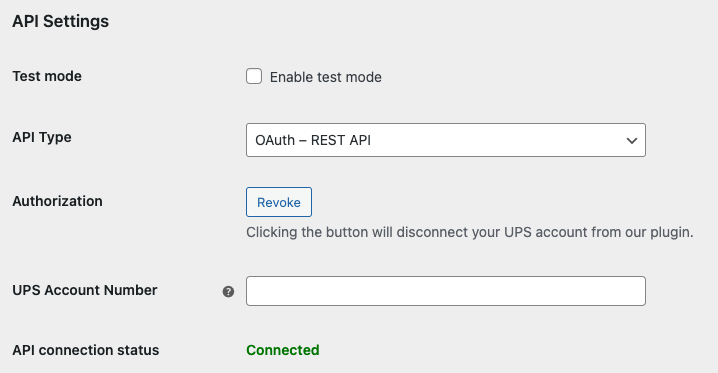
To disconnect your UPS account from our plugin, press Revoke.
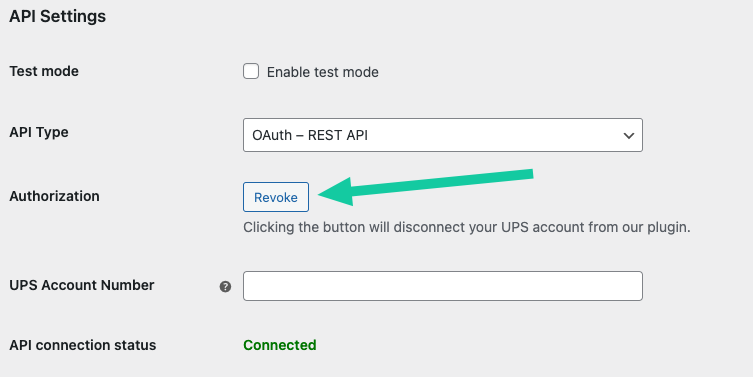
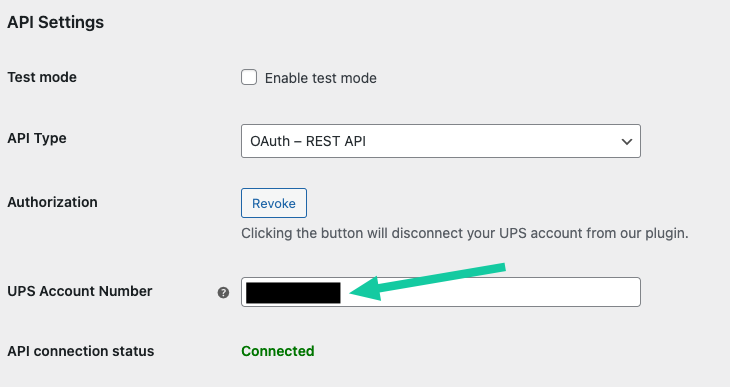
Optionally, if you use UPS SurePost shipping service, please fill in the UPS Account Number. If you don’t use UPS SurePost, leave this field empty.
API Access Key – XML API
For this method, you need to own a UPS account with access to the API. If you haven’t gained the API access, please check our guide on how to get the UPS API Access Key →
Enter your credentials (User ID, Password, Access Key and Account Number) in the plugin’s API Settings section fields below:
Test mode
– check this option to run the plugin in the test mode.
UPS User ID / UPS Password / UPS Access Key / UPS Account Number
– fill in these fields with the credentials you acquired during the UPS account registration process.
API connection status
– once your login credentials were entered and Save changes button hit, the API connection status should change to Connected and turn green.
If for some reason the plugin is not able to establish the connection with the UPS API, you will see the error message coming from the API with the detailed information on the cause of the problem, e.g.:

Labels

Label Format
– the format which the label will be generated in. Available label formats:
- PDF,
- GIF,
- ZPL,
- SPL,
- EPL2.
Advanced Options
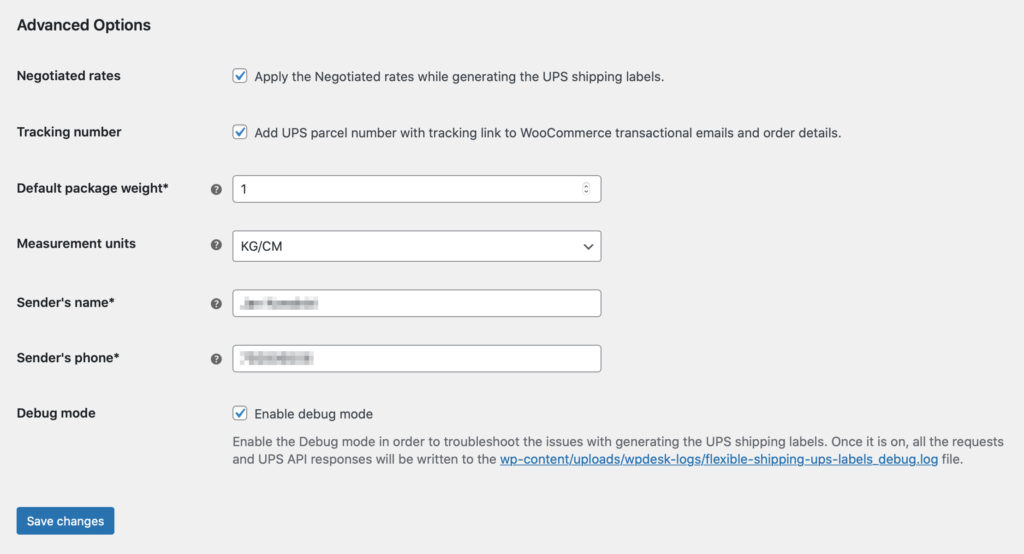
Negotiated rates
– option enabled by default. If ticked and if you have the Negotiated rates assigned to your account, they will be used and applied while generating the UPS shipping labels. This in turn should result in reducing the shipment’s cost.
Tracking number
– tick this checkbox if you want the parcel tracking link to be added to the WooCommerce transactional emails sent to your customers once their order is shipped.
Default package weight
– enter the weight value which will be used as default if the individual product’s weight has not been filled in.
Measurement units
– choose the measurement units the plugin should use. The units set in the WooCommerce settings at WooCommerce → Settings → Products → General → Measurements are used by default.
If you encounter the This measurement system is not valid for the selected country error, please switch the units. Once it is done they will be converted into the ones required by UPS API.
Sender’s name
– fill in these field with the name of the entity the ordered products are sent from, e.g. enter your shop’s or your company’s name here.
Sender’s phone
– fill in this field with the phone number of the entity the ordered products are sent from, e.g. enter your shop’s contact phone here.
Debug mode
– enabling the Debug Mode will let you identify and analyze the problems with generating the UPS shipping labels. All the requests, responses and the error messages coming back from the UPS API will be saved and written to the log file.