In order to establish the DHL Express API connection you will need to enter the login credentials at the very top of the plugin configuration screen:
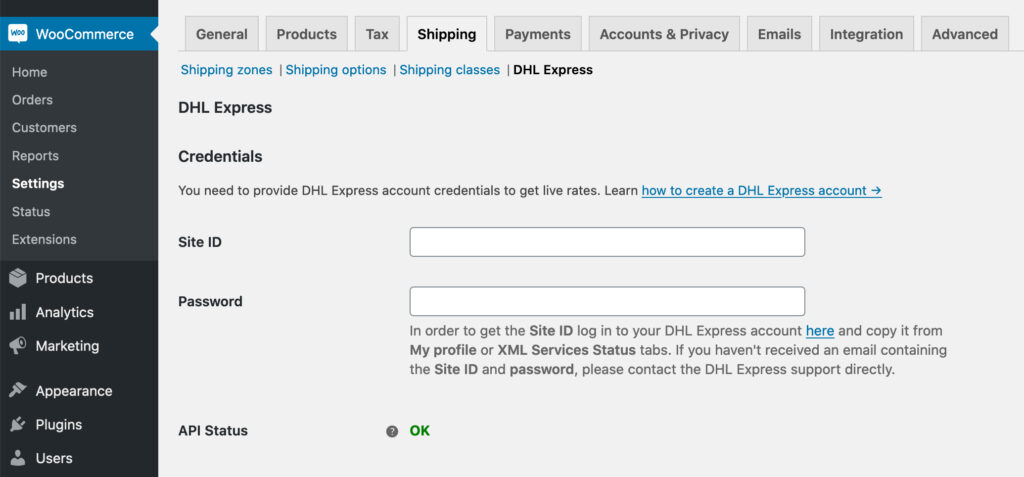
As you can see they consist of:
- Site ID
- Password
Entering them properly and establishing the connection will be confirmed by API OK Status turning green.
Obtaining the credentials will require creating a DHL Exprees account, which you will find described step-by-step below.
Creating a new DHL Express account
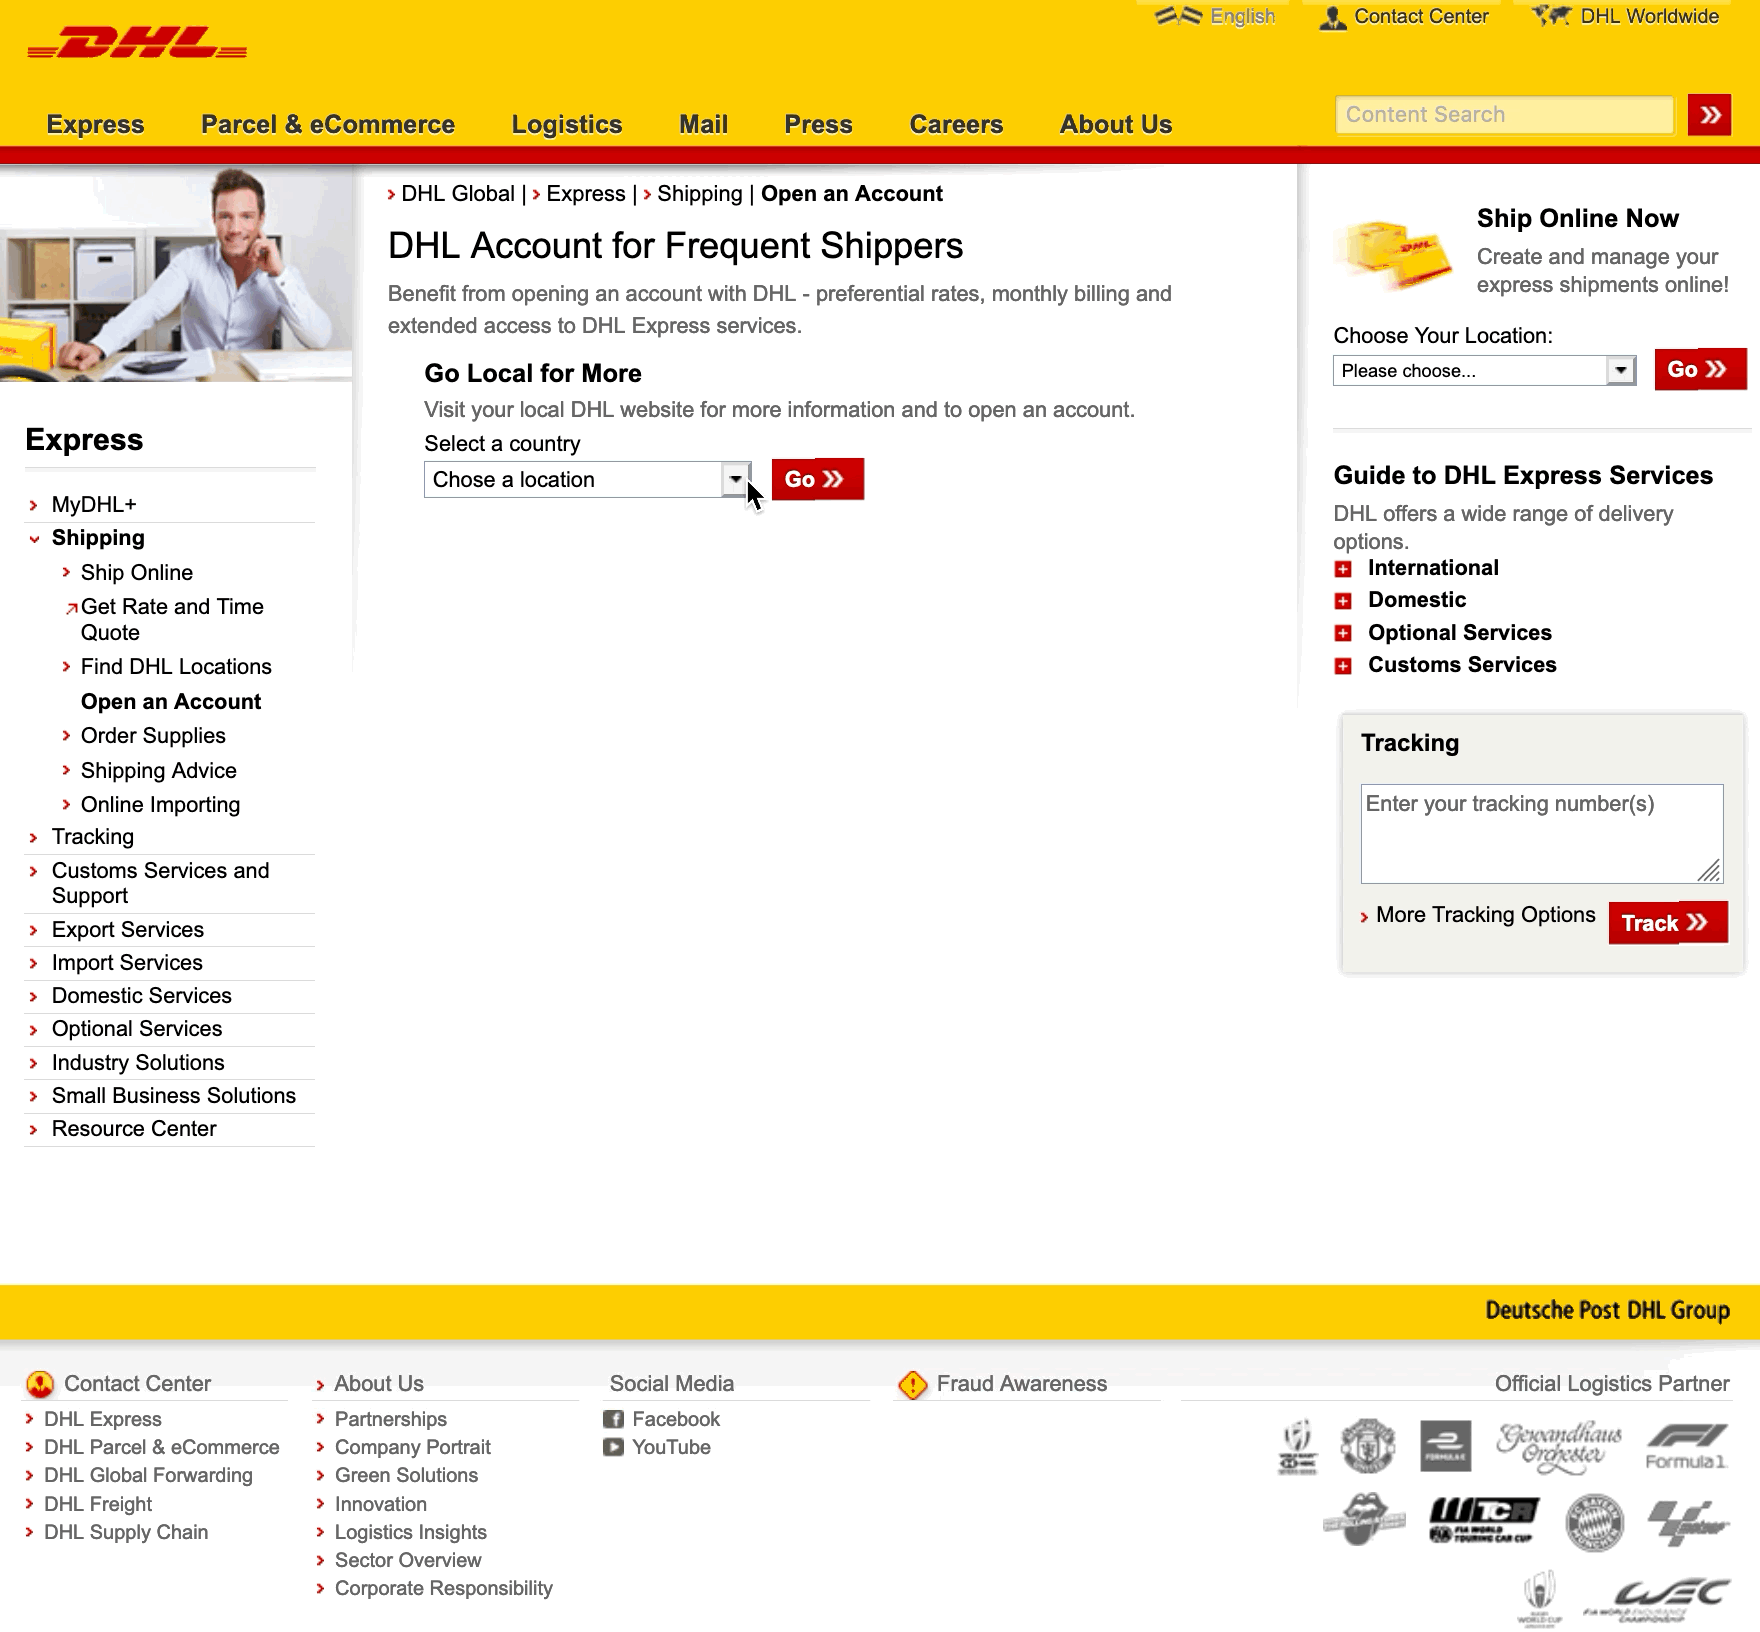
First of all, start with visiting the DHL Express site at https://www.dhl.com/en/express/shipping/open_account.html:
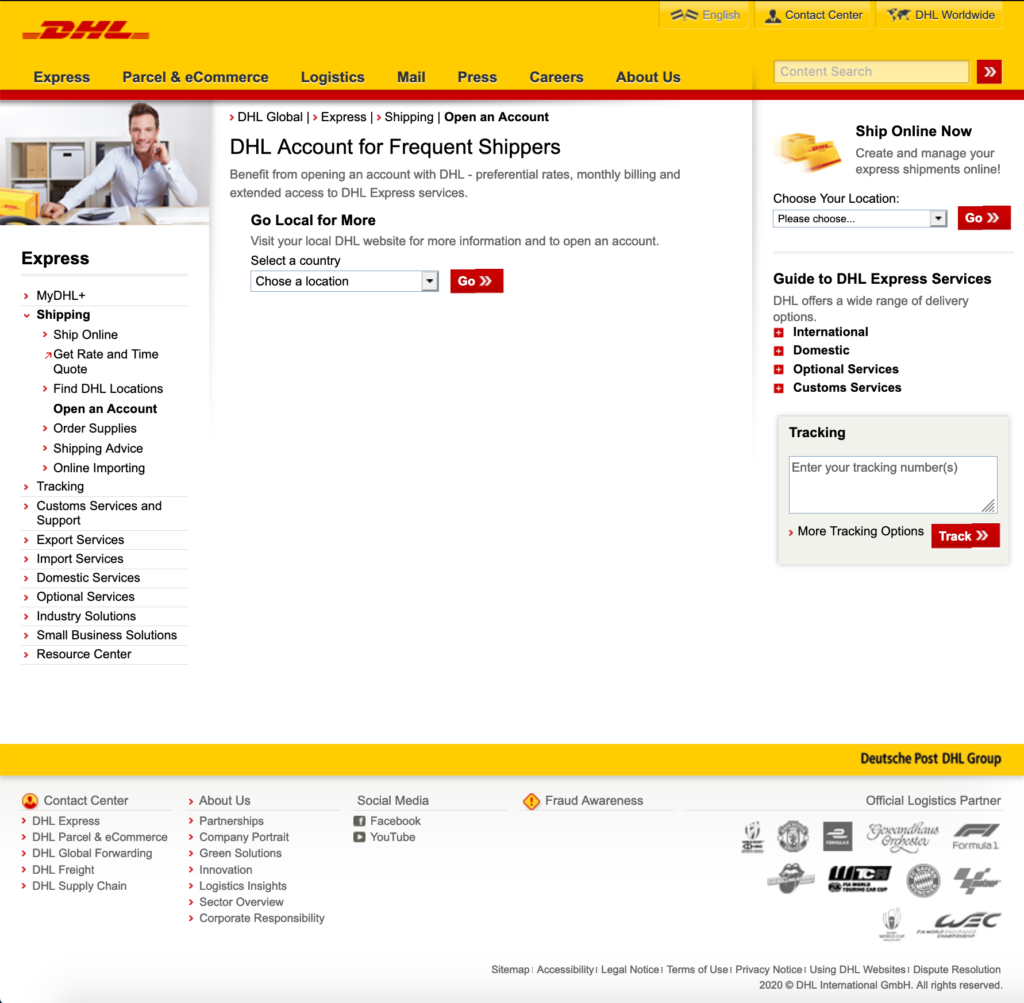
Select your country from the dropdown list in the middle of the screen and hit the Go ❯❯ button:
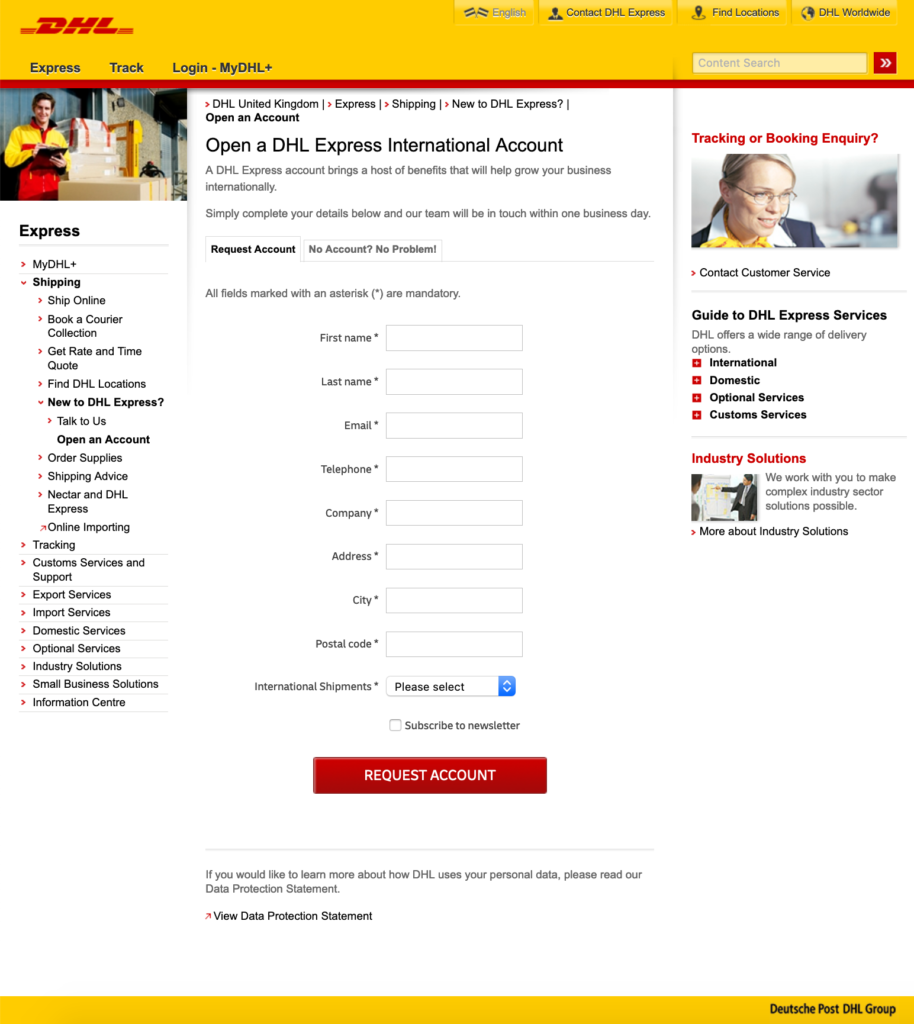
You should be redirected to the local DHL Express website dedicated for your country. Fill in the account creation form there by entering all the data in the mandatory fields and confirm the whole process with the REQUEST ACCOUNT button:
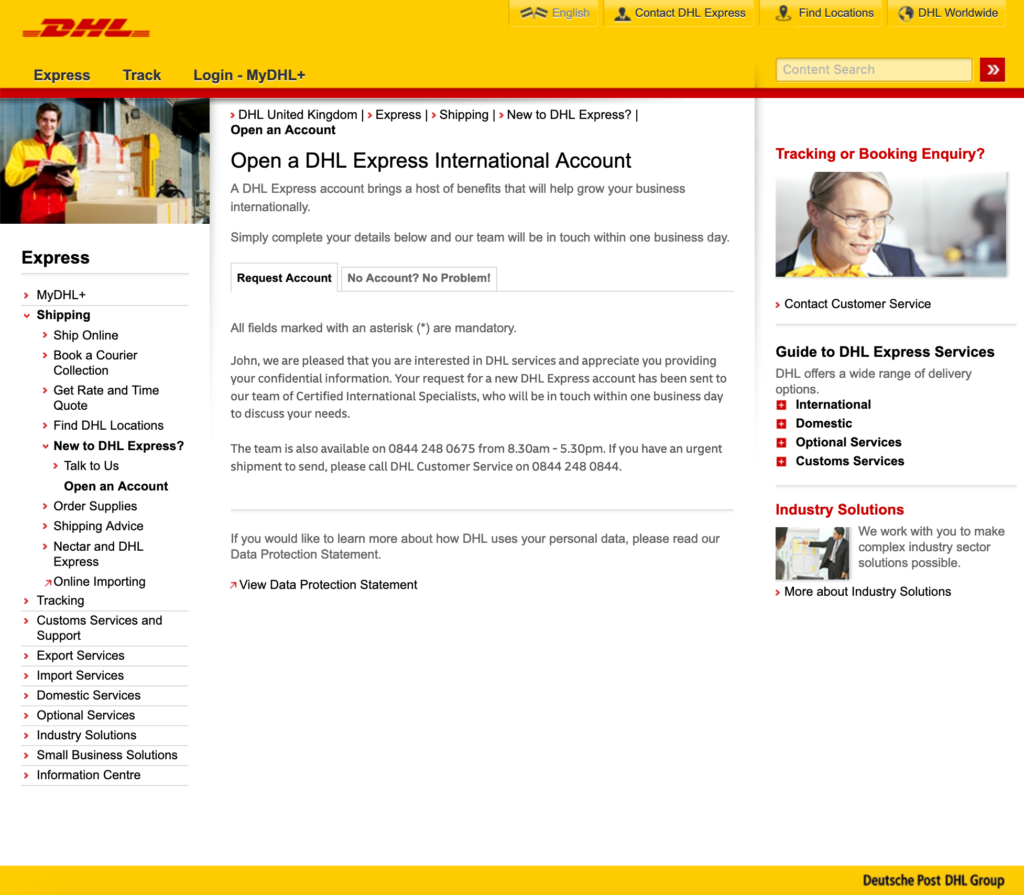
After the request has been sent you should be able to see the following confirmation notice informing that the DHL Express support is obliged to contact you within one business day to set further arrangements and finalize the whole procedure:
When everything is done and your account has been successfully created and fully activated, you should receive an email containing the login credentials – Site ID and Password. Enter them on the DHL Express plugin configuraton screen at WooCommerce → Settings → Shipping → DHL Express and hit the Save changes button at the bottom.
Using already existing DHL Express account
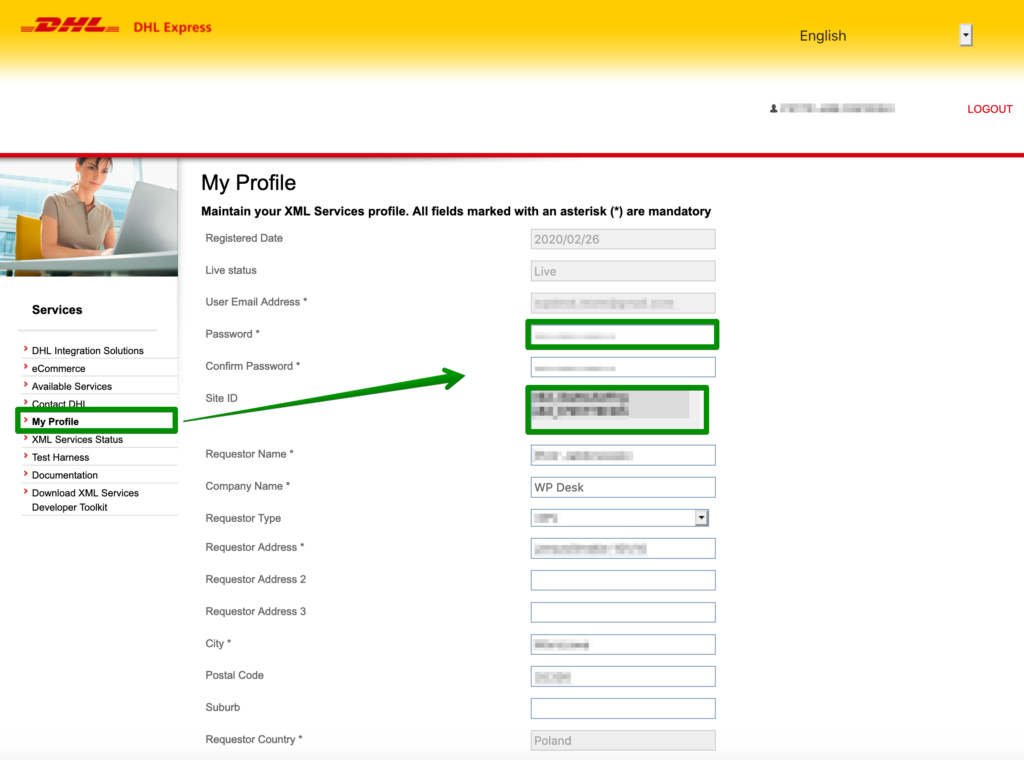
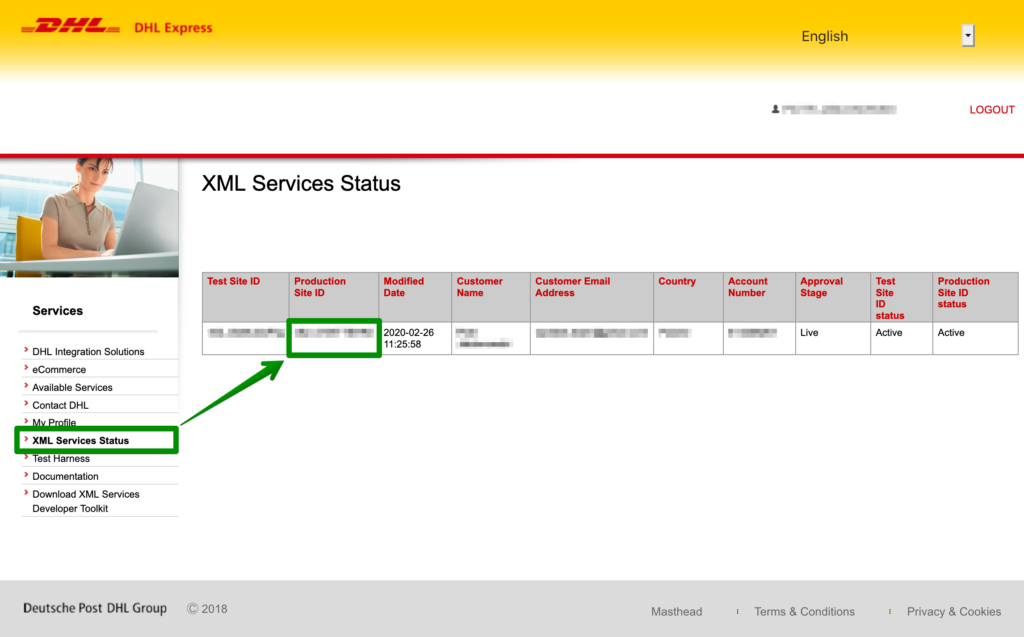
If you already have a DHL Express account you can simply check what your Site ID and Password are. In order to do that log in to your DHL Express account here:
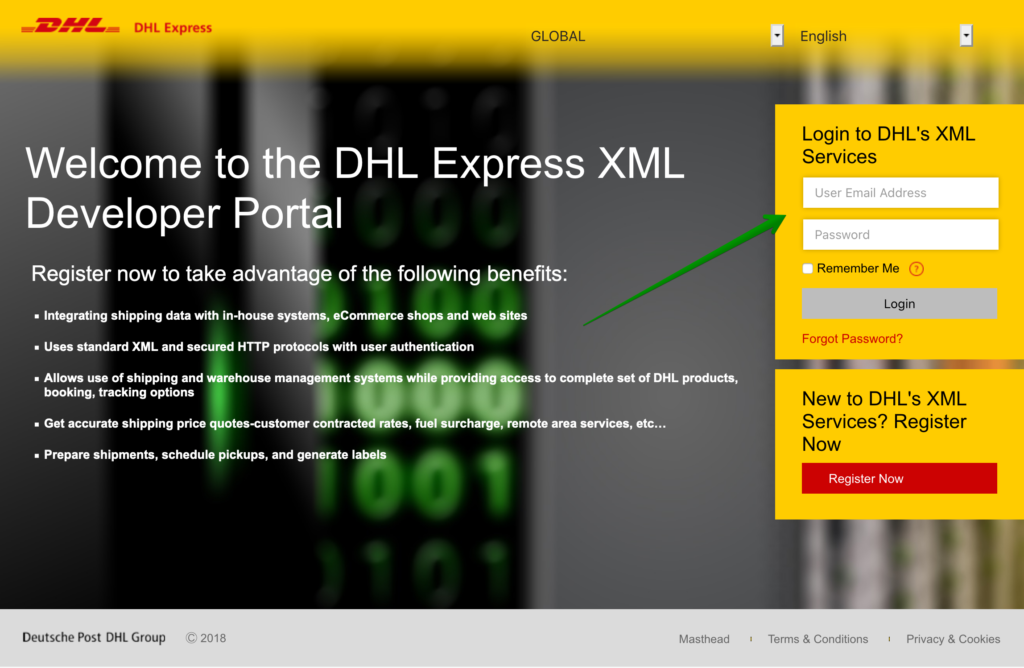
and copy them from My profile or XML Services Status tabs: